Sunday, November 30, 2008
NEW AND IMPROVED OKARA PARMESAN!

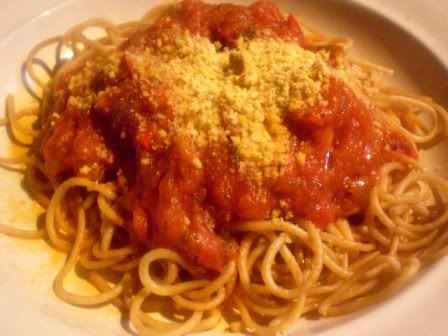
Back in May, I developed a recipe for a vegan "parmesan" utilizing dried okara-- the residue or pulp leftover from making soymilk or tofu. It was not bad, but I have been wanting to improve on it. I love Galaxy vegan soy parmesan, but it is only available in Canada online at one venue that I know of and is kind of pricey, considering how much I like to use it! That's my motivation for coming up with something I really like.
So I started playing with the recipe the other day, adding ingredients I thought would improve both flavor and texture. I like to add miso to my vegan cheeses for a fermented flavor, but you can't add much to a vegan parmesan made out of a light powdery substance, such as dehydrated okara, because it will make it soggy. So, I decided to dehydrate some miso for this recipe, in order to add more flavor. Miso powder does exist, but I have never been able to find it in my area. It was easy to make in an inexpensive home food dehydrator, and the directions are in the recipe.
So, here is the improved version, and I hope you'll like it! It contains more calories, due to the almonds and sesame seeds, but I think the calories are worth it! The recipe also uses up the okara from 2 batches of soymilk-maker okara, squeezed as dry as possible in a cloth (this is important!). The recipe makes 4 cups, which makes your effort worthwhile, too!
Printable Recipe
BRYANNA'S NEW AND IMPROVED OKARA PARMESAN SUBSTITUTE
Yield: 4 cups
Updated Sept. 10, 2010
This is a great way to use up okara, the residue from making soymilk. This really looks like grated cheese and tastes "cheesey" (the dried miso powder adds a fermented flavor). It shakes out easily, too. This makes quite alot , but keeps well in the refrigerator.
2 2/3 cups dried okara (about 4 cups fresh, squeezed dry in a cloth--this is the amount from 2 batches of soy milk using my new, richer soy milk recipe)
(see Cooking Tips below for how to dry okara)
1 1/3 cups blanched, slivered almonds OR 1 1/2 cups raw cashews (raw or lightly toasted)
1 cup nutritional yeast flakes
2/3 cup raw sesame seeds
3 tablespoons miso powder (see Cooking Tips below)
1 tablespoon garlic granules or powder
1/2 tablespoon salt
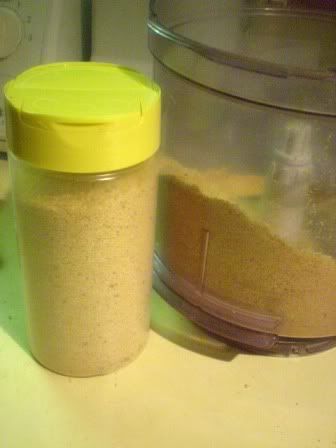
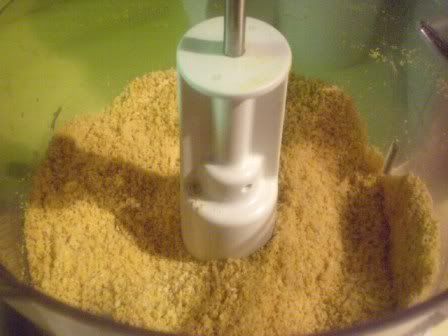
Process all of the ingredients in a dry food processor until it looks about the consistency of parmesan. You don't want a powder-- you want a little texture. You can use a DRY blender, but you'll have to watch the texture closely.
Place some in a covered container or shaker, and the rest in a ziplock bag, and keep refrigerated. (Make sure that the container is tightly closed so that no moisture gets in while in the refrigerator.)
Nutrition Facts
Nutrition (per 2 tablespoons): 79.0 calories; 48% calories from fat; 4.6g total fat; 0.0mg cholesterol; 182.5mg sodium; 182.3mg potassium; 6.6g carbohydrates; 2.1g fiber; 0.4g sugar; 4.5g net carbs; 4.6g protein; 1.5 points.
COOKING TIPS
DRYING OKARA:
If you have a large amount of okara, you can use a food dehydrator (use fruit-leather liners, or make a liner with cooking parchment), or spread it on cookie sheets and set it in the oven at its lowest temperature, with the oven door cracked open a little to let out moisture, until dry, stirring now and then.

To dry a small amount in a microwave oven:
Get a microwave-safe plate, or use the carousel in your microwave. Line it with two sheets of paper toweling (this will absorb the moisture), and top that with a piece of cooking parchment cut to fit (this will keep the okara from sticking as it dries). Spread the okara evenly on that, breaking up clumps as much as possible. Leave a space in the center empty (it burns easily in the center of the plate).
Microwave at half power (#5) in 5 minutes increments, stirring after each one, until dried. I took away the paper toweling after the first 5 minutes because it was quite wet, and replaced it with new paper toweling.
Let it cool thoroughly before using or storing (in zip-lock bags).
DRIED MISO POWDER:
This company makes freeze-dried miso powder. You may be able to find miso powder in a Japanese or Asian grocery store-- I'll have a look next time I have a chance. I wasn't going off-island when I made this recipe, so I made some myself.
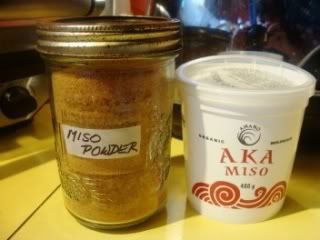
HOMEMADE MISO POWDER:
(400g or 14 oz. of miso make about 2 cups of powdered miso.)
You might as well make a whole bunch of miso powder at one go-- it keeps well if very dry and airtight.
I used a cheap little home food dehydrator with 2 trays. You could probably use the oven or microwave methods, as well. Check the dried okara notes above for directions. You'll have to dry the miso in small "dabs".

This is the whole 400 g carton of miso on one tray.
When the miso is shrunken and partially dried, break it up a bit more. I broke it up in the Vita-Mix until it was almost powdery-- more granulated, really-- and ten spread it back on the drying tray. Continue drying until you feel no moisture.
When it is dried and cooled off, grind it in a DRY Vita-Mix or other heavy-duty blender, or in small amounts in a DRY electric coffee/spice mill until powdery. If there are any hard resistant bits which refused to be pulverized, you can sift them off. Store in a tight jar or zip-lock bag.
Cheers!

Tuesday, November 25, 2008
A JAPANESE-THEMED VEGAN DINNER PARTY
HAPPY THANKSGIVING, MY AMERICAN FRIENDS!
Full plates!

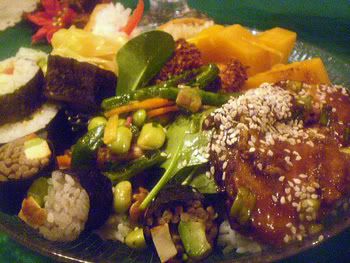
My full plate!
DH and I were invited to a vegan dinner party Sunday night. Our hosts chose a Japanese theme. It was a fun night-- great company and conversation in a lovely setting, wonderful hosts, some lovely Japanese music, and fabulous food (sake, too, if one was so inclined!). We all had the same thought-- "If only all those doubting omnivores, thinking us so deprived, could join us!"
Here are the highlights:

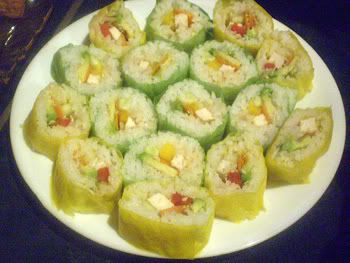
Some cute, colorful sushi that E. made especially for DH (who isn't fond of seaweed), rolled with "Soy Wraps" instead of nori.


I also made small ganmodoki-- Japanese fried tofu patties, traditionally made by Japanese tofu makers with day-old tofu (recipe below).
For dessert, P. brought a lovely vegan chocolate cake topped with fruit from Whole Foods (incredibly large boysenberries!), and I got brave and made a modern Japanese dessert!


I got the idea for this dessert from a Japanese cookbook (Washoku by Elizabeth Andoh-- not vegetarian but a lovely book), but, of course, used vegan waffles (this recipe would work well with this dessert, and you can also make waffles with this recipe, or this one, or this one). I also made the vegan vanilla gelato (the recipe is here-- just leave out the applesauce and amaretti crumbs!). Red bean jam or sweet red bean paste are used in many Asian desserts. We westerners often profess not to like it, so it was a gamble, but everyone loved it.
If you would like to recreate this recipe, you can use the recipes I noted above and view the recipe for Chunky Red Bean Jam for that recipe here, and the recipe for the Black Sugar Syrup here.
Here's the recipe for the tofu patties:
Printable Recipe
BRYANNA’S GANMODOKI (JAPANESE TOFU PATTIES)
Makes 8-12
From my book “Soyfoods Cooking for a Positive Menopause”.
This simple tofu dish is made every day in tofu shops in Japan, using the remaining tofu that was made the day before. These patties are usually deep-fried, but can be successfully shallow-fried or oven-fried. They are delicious cold or hot and will keep one week in the refrigerator. They make great snacks and day-hiking food, too.
You can use large patties like regular burgers, or small patties as appetizers. You can eat them plain or with soy sauce, chutney, ketchup, salsa, etc.. Cold ganmodoki can also be sliced and added to Japanese-style soups and stews (oden), or braise whole cold ganmodoki patties for 4-5 minutes in a mixture of 4 C. water, 1/4 c. Japanese soy sauce or tamari, 1/4 c. dry sherry or mirin (Japanese rice wine), and 1 T. unbleached sugar.
10-12 oz. firm tofu
2 T. grated carrot
2 T. grated fresh ginger
2 T. minced onion, green onion, or leek
2 T. frozen baby peas (petit pois), thawed
2 T. lightly-toasted sesame seeds
3/4 tsp. salt
OPTIONAL: 2 T. chopped mushrooms (preferably fresh shiitake or soaked dried shiitake or Chinese forest mushrooms-- discard stems)
cooking oil for frying or brushing
Crumble the tofu very finely, or process in a food processor. Add the remaining ingredients and knead together by hand or in the food processor until it holds together. Form into 8 to 12 patties (or more tiny ones for appetizers) with smooth edges.
To shallow-fry, heat about 1/2-inch of cooking oil in a frying pan over medium-high heat. Add the patties and fry til golden and crispy on one side. Turn over and fry until the other side is golden and crispy. Drain on paper towels.
To oven-fry, preheat the oven to 500 degrees F. Place the patties on dark oiled cookie sheets and brush or spray with a little cooking oil. Bake about 6 minutes per side, or until golden and crispy on both sides, and slightly puffed up.
Enjoy!!

Wednesday, November 19, 2008
A NEW, IMPROVED NO-OIL HUMMUS RECIPE

RECIPE AND INFO UPDATED JULY 7, 2017
I spread a little very good extra-virgin olive oil on the top of the hummus, but you can omit that if you wish. (There is no olive oil in the hummus itself.) I like to serve hummus like this in the Middle Eastern fashion, spread out on a plate, shallow pasta bowl, or platter-- it's easier to share that way!
SEE ALSO: My Vegan Version of Hummus Bil “Lahme” (Hummus with Spicy Vegan “Meat” & Nut Mixture)
http://veganfeastkitchen.blogspot.ca/2014/03/my-version-of-vegan-hummus-bil-lahme.html
*******************************
Many versions of this popular Middle Eastern chickpea dip or spread are chock-full of olive oil (I've seen recipes with as much as 1/2 cup of olive oil in the hummus) and too much sesame tahini. I have been making low-fat hummus for many years, and I have been constantly researching, experimenting and testing in order to make delicious homemade hummus without using a lot of oil. I wanted to make the best-tasting, creamiest hummus possible!
Over the years, I adjusted my familiar seasoning a little and adopted the "hot chickpea" method. I have learned that, besides using hot chickpeas and liquid, using more liquid and a good blender (instead of a food processor) is also crucial to making creamy, smooth hummus. My new improved recipe contains a samll amount of tahini and no olive oil in the hummus itself, but it's truly creamy and rich-tasting. Good ingredients, a good blender, and the method make all the difference.
Guests and family are very impressed by this recipe, and I have been known to even eat it for breakfast. (In the summer I make it almost every other day, with chickpeas cooked in my Instant Pot.) It's a great spread to have around for snacks, and it's far better (and cheaper) than any store bought hummus that you can buy (which are often far too thick and grainy). You might also like to try some of the variations below the recipe.


Printable Recipe
BRYANNA'S NEW, IMPROVED CREAMY NO-OIL HUMMUS (WITH A FEW VARIATIONS) (UPDATED March 2018) Yield: about 3 cups
Quality ingredients and HOT chickpeas and liquid are essential to good-tasting, creamy hummus, especially when you are using only a moderate amount of tahini, and olive oil simply for garnish, flavor and lubricant on the surface , but none in the hummus itself. A good blender and sufficient time blending is also essential to get the right texture.
Ingredients:
2 cups VERY HOT well-cooked chickpeas (garbanzo beans), or canned (a 19 ounce can), drained & rinsed
AND VERY HOT UNsalted chickpea cooking broth (aquafaba), UNsalted canned liquid, or water to cover the chickpeas, with a little more kept aside in case you need more while blending
NOTE: It is important to use VERY HOT chickpeas and liquid in this recipe-- it is one of the secrets to making creamy hummus without having to remove the chickpea skins, as is the norm in the Middle East.
1/4 cup lemon juice, preferably freshly-squeezed (or organic bottled)
2-3 cloves garlic, peeled and crushed
1 to 1 1/2 teaspoons salt (This sounds like a lot, but the amount of liquid increases the volume of this recipe.)
1/2 slightly heaping teaspoon ground cumin
2 heaping tablespoons sesame tahini (see Cooking Tips below for recommended brands)
Possible garnishes:
olive oil
za'atar (see this link)
black marinated olives
cooked or canned, drained chickpeas
paprika or smoked paprika (pimenton-- mild or hot)
chopped fresh parsley or mint
chopped green onions
toasted pine nuts or almonds
grated organic lemon zest
Directions:
If possible, use freshly-cooked chickpeas straight from the pot. If that is not possible, reheat home-cooked chickpeas or canned chickpeas by heating them, just covered in their cooking broth, or water if they are canned (do NOT use the canned liquid!) in a pot or in the microwave until they are very hot throughout.
Place the hot chickpeas and the liquid that just covers them in a blender (preferably high speed) with all of the ingredients. Process until it is very smooth and creamy-- no granulated texture.
If the mixture seems too thick and/or the blender stalls, you may add more hot liquid, 1 tablespoon at a time. Remember that the hummus at this point should be thinner than you want it when it has cooled! It will thicken as it cools. It is meant to be smooth and creamy, not thick and pasty (see photos above). Note: The garlic flavor will be stronger after the hummus sits for a while.
Place in a shallow bowl or spread on a plate, drizzle with a bit of olive oil, if you like, cover and refrigerate until serving time. FOR BEST FLAVOR, BRING TO ROOM TEMPERATURE BEFORE SERVING.
Add Garnishes as you like. Serve with raw veggies and wedges of sprouted or whole wheat pita bread, pita chips, sourdough bread, or fat-free dark rye crisps.
Nutrition Facts
Nutrition (per 1/3 cup serving): 92.2 calories; 26% calories from fat; 2.9g total fat; 0.0mg cholesterol; 182.3mg sodium; 150.1mg potassium; 13.2g carbohydrates; 3.5g fiber; 2.2g sugar; 9.7g net carbs; 4.4g protein; 1.4 points.
Cooking Tips
Cooks Illustrated Magazine recommends the following brands of tahini
Joyva Sesame Tahini
Krinos Tahini
Arrowhead Mills Organic Sesame Tahini
Alma Sesame Tahini
Cortas Tahina
(I use ARZ Fine Foods Tahina, a Lebanese import distributed from Toronto.)
Enjoy!!

http://veganfeastkitchen.blogspot.ca/2014/03/my-version-of-vegan-hummus-bil-lahme.html
*******************************
Many versions of this popular Middle Eastern chickpea dip or spread are chock-full of olive oil (I've seen recipes with as much as 1/2 cup of olive oil in the hummus) and too much sesame tahini. I have been making low-fat hummus for many years, and I have been constantly researching, experimenting and testing in order to make delicious homemade hummus without using a lot of oil. I wanted to make the best-tasting, creamiest hummus possible!
Over the years, I adjusted my familiar seasoning a little and adopted the "hot chickpea" method. I have learned that, besides using hot chickpeas and liquid, using more liquid and a good blender (instead of a food processor) is also crucial to making creamy, smooth hummus. My new improved recipe contains a samll amount of tahini and no olive oil in the hummus itself, but it's truly creamy and rich-tasting. Good ingredients, a good blender, and the method make all the difference.
Guests and family are very impressed by this recipe, and I have been known to even eat it for breakfast. (In the summer I make it almost every other day, with chickpeas cooked in my Instant Pot.) It's a great spread to have around for snacks, and it's far better (and cheaper) than any store bought hummus that you can buy (which are often far too thick and grainy). You might also like to try some of the variations below the recipe.


BRYANNA'S NEW, IMPROVED CREAMY NO-OIL HUMMUS (WITH A FEW VARIATIONS) (UPDATED March 2018) Yield: about 3 cups
Quality ingredients and HOT chickpeas and liquid are essential to good-tasting, creamy hummus, especially when you are using only a moderate amount of tahini, and olive oil simply for garnish, flavor and lubricant on the surface , but none in the hummus itself. A good blender and sufficient time blending is also essential to get the right texture.
Ingredients:
2 cups VERY HOT well-cooked chickpeas (garbanzo beans), or canned (a 19 ounce can), drained & rinsed
AND VERY HOT UNsalted chickpea cooking broth (aquafaba), UNsalted canned liquid, or water to cover the chickpeas, with a little more kept aside in case you need more while blending
NOTE: It is important to use VERY HOT chickpeas and liquid in this recipe-- it is one of the secrets to making creamy hummus without having to remove the chickpea skins, as is the norm in the Middle East.
1/4 cup lemon juice, preferably freshly-squeezed (or organic bottled)
2-3 cloves garlic, peeled and crushed
1 to 1 1/2 teaspoons salt (This sounds like a lot, but the amount of liquid increases the volume of this recipe.)
1/2 slightly heaping teaspoon ground cumin
2 heaping tablespoons sesame tahini (see Cooking Tips below for recommended brands)
Possible garnishes:
olive oil
za'atar (see this link)
black marinated olives
cooked or canned, drained chickpeas
paprika or smoked paprika (pimenton-- mild or hot)
chopped fresh parsley or mint
chopped green onions
toasted pine nuts or almonds
grated organic lemon zest
Directions:
If possible, use freshly-cooked chickpeas straight from the pot. If that is not possible, reheat home-cooked chickpeas or canned chickpeas by heating them, just covered in their cooking broth, or water if they are canned (do NOT use the canned liquid!) in a pot or in the microwave until they are very hot throughout.
Place the hot chickpeas and the liquid that just covers them in a blender (preferably high speed) with all of the ingredients. Process until it is very smooth and creamy-- no granulated texture.
If the mixture seems too thick and/or the blender stalls, you may add more hot liquid, 1 tablespoon at a time. Remember that the hummus at this point should be thinner than you want it when it has cooled! It will thicken as it cools. It is meant to be smooth and creamy, not thick and pasty (see photos above). Note: The garlic flavor will be stronger after the hummus sits for a while.
Place in a shallow bowl or spread on a plate, drizzle with a bit of olive oil, if you like, cover and refrigerate until serving time. FOR BEST FLAVOR, BRING TO ROOM TEMPERATURE BEFORE SERVING.
Add Garnishes as you like. Serve with raw veggies and wedges of sprouted or whole wheat pita bread, pita chips, sourdough bread, or fat-free dark rye crisps.
Nutrition Facts
Nutrition (per 1/3 cup serving): 92.2 calories; 26% calories from fat; 2.9g total fat; 0.0mg cholesterol; 182.3mg sodium; 150.1mg potassium; 13.2g carbohydrates; 3.5g fiber; 2.2g sugar; 9.7g net carbs; 4.4g protein; 1.4 points.
Cooking Tips
Cooks Illustrated Magazine recommends the following brands of tahini
Joyva Sesame Tahini
Krinos Tahini
Arrowhead Mills Organic Sesame Tahini
Alma Sesame Tahini
Cortas Tahina
(I use ARZ Fine Foods Tahina, a Lebanese import distributed from Toronto.)
Enjoy!!
Thursday, November 13, 2008
VEGAN, WHOLE GRAIN SOURDOUGH PANCAKES

Since I read about the study that showed positive blood sugar responses to sourdough breads (good news for diabetics, folks with heart disease and those of us trying to lose weight-- read more about this here), I've been refreshing my starters and refining my old sourdough recipes (some of which need "veganizing).
I used to make sourdough pancakes regularly for my family. They were our favorite pancakes. Here is my newly-revised vegan version, using whole grain flours. It turned out beautifully! BTW, sourdough pancakes have a slightly different texture from regular pancakes-- fluffy, but a little more "bready". And, of course, with that sourdough tang that I love.
If you are unfamiliar with sourdough, see this post. My San Francisco starter, how to make it vegan and how to use and care for it is at that link. I actually have two vegan sourdough starters-- both are very reliable. I also use the "Oregon Trail Sourdough Starter", which I treat the same way. You can get a free (dried) starter (and it's a great story that goes with it) here. You just pay postage. (PS: I don't use the sugar and potato they call for in the instructions., and it works fine.)
Printable Recipe
BRYANNA'S WHOLE GRAIN VEGAN SOURDOUGH PANCAKES
Servings: 4 (multiply as needed)
These are so tasty! You can get a free starter (and it's a great story that goes with it!) here. (PS: I don't use the sugar and potato they call for in the starter.) I like this combination of flours, but feel free to experiment. See this post for sourdough vegan waffles and crepes.
Sourdough Sponge:
2 cups warm water
1 cup fresh, bubbly sourdough starter (I use a starter made with white unbleached flour)
1 2/3 cups whole wheat pastry flour
1/3 cup brown rice flour (or you can grind small amounts of short grain brown rice to a powder in a dry coffee/spice mill)
1/2 cup corn flour (or you can grind small amounts of yellow cornmeal to a powder in a dry coffee/spice mill)
Add in morning:
1 Tbs oil
2 Tbs organic sugar
1 tsp salt
1 tsp baking powder
Last Addition:
2 Tbs Ener-G Egg Replacer or Orgran No-Egg powder beaten with
1/4 cup water (beat with an immersion [stick] blender until like softly-beaten egg whites)
1 tsp baking soda dissolved in 1 T. warm water
THE NIGHT BEFORE: mix together in a large bowl: the water, and sourdough starter until dissolved. Then stir in all of the flours (and/or grains) you are using.
The batter will be quite thick. Cover well and let sit in a warm place overnight. It should be thinner and bubbly in the morning. Make sure your bowl is big enough for the batter to rise.

IN THE MORNING: stir in the oil, sugar, salt and baking powder into the batter.
Gently fold in the beaten egg replacer and the dissolved baking soda.
Let the batter rise up while you heat a large, heavy cast iron skillet or griddle, or nonstick skillet or griddle. (Lightly oil, if necessary.)

Cook as for ordinary pancakes but make small pancakes, at medium-high heat, using about 3 tablespoons of batter per pancake (I have a small gravy ladle that holds just the right amount). There will be bubbles in the top of the pancakes when they are ready to turn.


Eat immediately with vegan butter and maple syrup, OR, for a lower fat and lower calorie treat, use tofu sour creme (homemade recipe here) or cashew sour creme, or non-dairy yogurt with applesauce or another homemade fruit sauce, or a low-sugar jam, warmed up.
Yield: makes 30-36 small pancakes or about 24 larger ones
Nutrition Facts
Nutrition (per serving): 398.4 calories; 11% calories from fat; 5.4g total fat; 0.0mg cholesterol; 791.9mg sodium; 311.2mg potassium; 80.3g carbohydrates; 9.2g fiber; 6.8g sugar; 71.1g net carbs; 10.6g protein; 7.6 points.
VARIATIONS: (total flour for this recipe: 2 1/2 cups)
1.) Use 2 c. buckwheat flour and 1/2 c. unbleached white flour
2.) Use 1 3/4 c. whole wheat pastry flour and 3/4 c. fine bulgur wheat.
3.) For liquid, use 1 c. pureed winter squash or pumpkin, mixed with 1 and 1/2 c. water
4.) Use 1 c. quick oats and 1 and 1/2 c. unbleached white flour or whole wheat pastry flour.
5.) Use 1 c. cornmeal and 1 and 1/2 c.unbleached white flour or whole wheat pastry flour
6.) Sprinkle pancakes before turning over with well-drained blueberries or other fruit.
Enjoy!!

Monday, November 10, 2008
CREAMLESS (AND SOY-FREE) CREAMY TOMATO SOUP

This soup reminds us of the comforting canned tomato soup most of us grew up with, but with vastly superior flavor and texture. The recipe I started with was published in the September 2008 Cook's Illustrated magazine, BUT I mistakenly used one 28 oz. can of tomatoes instead of two. I didn't discover my mistake until after three of us devoured the whole pot of soup! And, I, of course, had veganized it, used Italian bread instead of white sandwich bread, and made a few changes to the seasoning and technique. (As I mentioned below, gluten-free bread would probably work in this recipe, too.) (Nov. 2012: I have revised the technique a bit, making it a bit simpler to make.)
But we loved it with the mistake and the changes. The bread and olive oil blend with the tomatoes to make an exceptionally silky texture. Bread has been used as a thickener for soups, sauces and stews since the time of the ancient Greeks, but is rarely used these days. I think the technique should be revived.
Printable Recipe
BRYANNA'S VEGAN VERSION OF CREAMLESS CREAMY TOMATO SOUP (SF, could be GF) Updated November 11, 2012
Servings: 4/ Yield: about 4 1/2 cups
1/4 cup extra virgin olive oil, divided
1 medium onion, chopped medium onion
3 medium garlic cloves, minced
1 bay leaf
1 (28-ounce) can good quality whole peeled plum tomatoes packed in juice (unsalted)
2 cups chicken-style veggie broth (I recommend Better than Bouillon No-Chicken Broth Base)
3 large slices commercial Italian-type bread, crusts removed, torn into 1-inch pieces OR 1 cup white panko (dry Japanese bread crumbs) soaked with 1/4 cup water (fluff with a fork)
(NOTE: I haven't tried this with a gluten-free bread, but I don't see why it wouldn't work.)
2 tablespoons brown sugar (or to taste-- it depends on your tomatoes)
2 tablespoons medium-dry sherry OR 1/4 cup white wine (can be non-alcoholic)
1 teaspoon salt (less if you use salted tomatoes, in which case, salt to taste)
freshly-ground black pepper to taste
Garnish:
Mix tofu sour creme (commercial or homemade)
or cashew
sour cream OR vegan mayo (commercial or homemade) with a little nondairy milk and swirl some into each serving for a garnish,
along with a sprig of fresh rosemary or a sprinkle of za'atar or fresh herbs.
Heat the olive oil in a heavy pot over medium-high heat until shimmering. Add onion, garlic, and bay leaf. Cook, stirring frequently, until the onion is translucent, 3 to 5 minutes.MICROWAVE OPTION: Place the olive oil, onions, garlic, and bay leaf in a covered microwave-safe casserole and microwave on 100% power for 5 minutes. Scrape into a heavy soup pot and place over medium-high heat.
Which ever way you cooked the onions, etc., stir the tomatoes and their juice into the pot. Using a potato masher, mash the tomatoes (be careful-- they squirt!) until no pieces bigger than 2 inches remain. Stir in the broth, bread and sugar and bring the mixture to boil. Reduce heat to medium and cook, stirring occasionally, until bread is completely saturated and starts to break down, which takes about 5 minutes. Remove and discard the bay leaf.
Transfer the mixture to a large blender or Vita-Mix. (CAUTION! Take the middle cap out of the lid in order to to allow hot steam to escape; cover the lid loosely with a folded tea towel while you blend.) (NOTE: Unless you have a more industrial-type immersion/stick blender, I don't think it will do the job as well as a blender.) Process until the mixture is smooth and creamy, 2 to 3 minutes. Rinse out the pot and return the blended mixture to the pot. Stir in the wine. Return soup to boil, add salt, and season to taste with freshly-ground black pepper. Taste to see if it needs any more salt or sugar. Serve, garnished as suggested above, in individual bowls.
Nutrition Facts
Nutrition (per serving): 229.4 calories; 53% calories from fat; 14.0g total fat; 0.0mg cholesterol; 890.7mg sodium; 541.5mg potassium; 24.1g carbohydrates; 2.6g fiber; 14.5g sugar; 21.4g net carbs; 3.3g protein; 5.2 points.
Enjoy!!

Saturday, November 8, 2008
ROASTED APPLESAUCE/AMARETTI VEGAN GELATO

Printable Recipe (includes "Amaretti Crumbs" recipe
BRYANNA'S ROASTED APPLESAUCE/AMARETTI VEGAN GELATO
Makes 8/ 1/2-cup servings.
This is really delicious. The brown rice syrup adds a faintly caramel-like flavor that makes the ice cream seem very rich.
2 1/3 cup plain soy milk, or almond milk (such as Almond Breeze Original) or So Delicious Coconut Beverage, Original
1/2 cup raw cashews or cashew pieces, soaked in boiling water for 10 minutes and drained
1/2 cup brown rice syrup
2 teaspoons pure vanilla extract or vanilla paste
1/2 cup light-colored granulated organic sugar
1/4 teaspoon salt
1/2 tablespoon Instant Clear-Jel (See about this product and where to get it at this post ) OR 1/4 teaspoon Xanthan gum or Guar gum
ADDITIONS:
1/2 cup Vegan Amaretti Crumbs (see recipe in Cooking Tips) OR, you can simply use chopped toasted almonds instead
1/2 cup Chunky Roasted Applesauce (pictures at end of post)
Place the milk into a blender along with the soaked, drained cashews, and blend until VERY smooth and frothy (make sure that it is not grainy at all).
Mix all of the remaining ingredients, EXCEPT the Additions, into this mixture and blend again until it is VERY smooth.
Chill the gelato mixture thoroughly, and then freeze according to directions for your ice cream machine. Add the Amaretti Crumbs 30 seconds before stopping the machine. Remove the dasher and add the applesauce to the center. Using a small spatula, swirl the applesauce roughly through the ice cream.
Scoop into a quart container, cover and freeze until hard before serving.
Servings: 8
Yield: 1 quart
Nutrition Facts
Nutrition (per 1/2 cup): 273.7 calories; 18% calories from fat; 5.9g total fat; 0.0mg cholesterol; 131.1mg sodium; 182.5mg potassium; 55.8g carbohydrates; 1.1g fiber; 45.0g sugar; 54.7g net carbs; 5.0g protein; 5.8 points.
Printable Recipe
BRYANNA’S "AMARETTI" CRUMBS (SOY-FREE)
Makes 2 and 1/2 cups
From my book "Nonna's Italian Kitchen".
Italians use crumbled amaretti cookies (almond macaroons) in many desserts (and even in a few savory dishes with Renaissance roots). Since macaroons are made with eggs, we can't use packaged cookies for this purpose.
You can use this easy recipe when you need amaretti crumbs, and do away with the need to have baked amaretti on hand.
Nuts and breadcrumbs can be quickly toasted in your microwave, if you like.. You can grind them easily and quickly in a small electric spice or coffee grinder, or mini-chopper.
1 c. lightly toasted ground almonds
1 c. toasted white or sweet bread crumbs
1/2 c. maple syrup
1 tsp. pure almond extract
Preheat the oven to 300 degrees F.
Mix all of the ingredients together well. Spread the mixture on 2 cookie sheets and place in the heated oven.
Toast the mixture for about 15 minutes or until it has dried out a bit, but is still slightly chewy. Cool the mixture, then freeze in rigid plastic containers.
Chunky Roasted Applesauce after 45 minutes in the oven:

Chunky Roasted Applesauce after broiling, before adding sugar:

Enjoy!!

Monday, November 3, 2008
APPLES GALORE, AND WHAT I DID WITH THEM TODAY

It has been a great apple year and the other day a friend gave me a huge bagful of them. I just got around to dealing with most of them today and only have that bowlful left to use up before the week is out.
Of course, I made a pie-- a freeform type with a few raisins added.

And I froze some extra pie fillings:

Just pile each portion of filling in a foil-lined cake or pie pan, freeze it solid, and then take away the pans and pop the foil packages into plastic bags. This way, you have just the right amount and shape to fit into your pie crust.
According to The Perfect Pie by Susan G. Purdy:
"To bake, line a pie plate with a layer of thawed frozen pastry (or fresh--BCG), brush with... fruit preserves. Unwrap the frozen fruit packet (do not thaw) and set it in the pastry. Cut steam vents in the rolled-out top crust. Moisten the edges of the lower crust, then cover the pie with its top crust. Fold the edges of the top crust over the lower one and pinch to seal. Mold the edge into a raised rim and flute... (Note from BCG: If you like a shiny crust, brush it with soy or nut milk-- sprinkle with sugar if desired.)
Bake in the lower third of a preheated 425 degree F oven for 25 minutes. Reduce the heat to 350 degrees F, raise the pie to the center of the oven, and cover the pastry edges with a foil if they seem to be browning too fast. Continue baking for another 30 to 35 minutes, or until the pastry is golden brown and the fruit tender. Serve warm for best texture and flavor."
Then I made two kinds of applesauce:

I made a smooth pink applesauce (see how I make this without having to peel, pit or core the apples on this blog post). I made it pink by adding 2 cups of crabapple sauce that I had in the freezer to the cooked, pureed apples. I just added a little unbleached sugar to taste-- it's tangier than usual with the crabapple. Very refreshing and pretty!
The second type is a chunky roasted applesauce. I don't really have a recipe for this, but here's what you do:
Preheat the oven to 375 degrees F. Clean and core the apples and cut into chunks no bigger than 1". I don't peel them, since they are organic-- just cut out any bad spots. Get a large shallow roasting pan (or pans) and fill the bottom with about 1/4" of water. Add a splash of lemon juice and a little unbleached sugar. Pile in the apples no more than 2" deep. Toss with the liquid. Cover the pan(s) with foil and cook for about 45 minutes. Remove the foil. Place under the broiler (about 1 foot below the broiler element) in order to cook down the remaining liquid and char the apples a little. Watch them! Printable Recipe
Remove from the oven and add brown sugar to taste-- not too much! Delicious! (See pictures of roasting process at this post.)
MORE APPLE RECIPES FROM THIS BLOG (Updated Nov. 1, 2015):
(See more here:
http://veganfeastkitchen.blogspot.ca/2009/10/using-up-fall-bounty-apples-and-pears.html )
Massaged Kale Salad w/ Red Cabbage, Apples, Pecans & Pomegranate Molasses Dressing
Oat Groats w/ Chanterelle Mushrooms & Apples in Creamy Wine Sauce
Crispy Marinated Tofu/Breast of Tofu with Apples & Onions in Creamy White Wine Sauce Whole Grain Apple-Almond Cake
Rhubarb and Apple Crisp with Mint and Orange
Irish Apple Bread Pudding
Apple and Cranberry Oat Crisp
Sherried Autumnal Apple and Potato Stew
Apple-Polenta-Pecan Crisp
Apple Roly-Poly
Chunky Roasted Applesauce
Rustic Apple-Raisin Pie with Low-Fat Olive Oil Pastry
Chard and Apple Salad with Maple-Glazed Squash and Raspberry-Balsamic Vinaigrette
Making smooth applesauce the easy way!
Peruvian Quinoa and Apple Beverage
Apple Roly-Poly
Chunky Roasted Applesauce
Rustic Apple-Raisin Pie with Low-Fat Olive Oil Pastry
Chard and Apple Salad with Maple-Glazed Squash and Raspberry-Balsamic Vinaigrette
Making smooth applesauce the easy way!
Peruvian Quinoa and Apple Beverage
 |
| The Denman Is. Fall foliage on the road where we take our walks |
Enjoy the fruits of Fall!

Subscribe to:
Posts (Atom)